Friday, September 28, 2012

Day Five: Hexagons


Amy: Hexies...oh how I adore hexies!  I cut the smaller hexagon pattern and layered it onto my jar die and did some simple stamping.  The blue hexagon pattern is cut from a 12 x 12 sheet of paper.  Actually both started as 12 x 12's.  The love contrast of the sizes and colors.


Julie: I am FOREVER happy that hexagons came into the scrappy world and I HOPE.THEY.NEVER.LEAVE. ever ever ever!!!! I love love love them!! And every time a scrappy company releases some hexagons, I am ALL OVER IT!!!!! For my page, I love the denim background so much, I didn't want to lose that in my page, so I used hexagons as an accent on my page .... I cut these from a 12x12 sheet of My Minds Eye paper!


Yvonne: This is my fave photo of my niece and nephew to date so even though I've scrapped this photo on a traditional layout, I wanted to create an altered canvas to display at home.


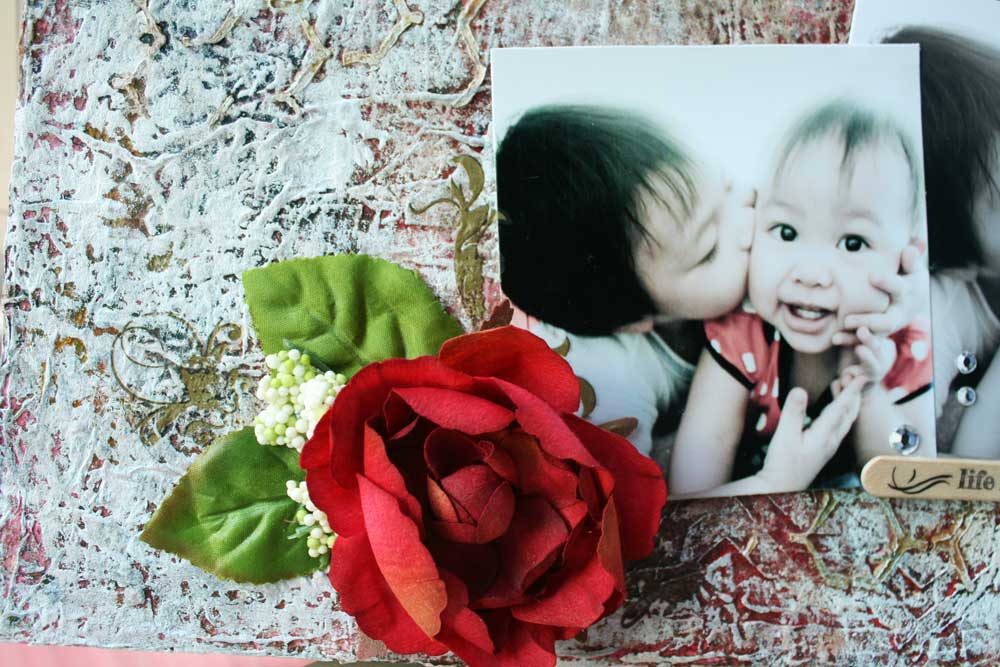
I adhered scrunched up wrapping tissue to the base of the 12 x 12 canvas, then adhered some leftover diecut letters [see top right]. Then I applied fiber paste with various stencils. When that dried, I played around with paint colours and dabbed with wet rag to make sure the paint got into the grooves to define the patterns on the base. Then a bloom and some swirl rub-ons and I have a lovely display piece! :)

____________________________________________________

Time really flies. Today's the last day of our five-day workshop! :( Have you had fun in the last few days? We would love to see your inspired projects. Upload them to our Flickr group OR leave a link in the comment section. You have till 12 October to be in the running for some RAKs. The winners will be announced on 15 October.:)

Here are today's sketches.

Card sketch


Layout sketch


Thursday, September 27, 2012

Day Four: Punches and diecuts


Yvonne: I have quite a number of punches in my stash so I decided to see how many I could utilize to make a simple card. :)


I went with 5 punches...okay 4 punches and a corner rounder. :)


Here is a look at my card components before assembly.


Then I finished with some twine and a pearl for the centre of my butterfly. Now let's see how you utilize your punches and diecuts! :)


Julie: I totally decided to have fun with my punches and diecuts!! I remembered that I had a page of Amy Butler butterflies in my stash and decided to punch them out and just lay them wherever they landed on my page!!! And then I used my Martha Stewart butterfly punch to fill in some other blank spots on my page!! Just remember... you don't always have to use the newest and greatest out there -- grab something from your stash and go to town!!! :)


Amy:   I LOVE dies and punches.  The acorns are cut with a die and I use a corner rounder punch on the base panels.  They are actually altered magnets.

_________________________________________________

There are so many different ways to utilize your punches and diecuts! Show us how you were inspired by uploading your projects to our Flickr pool OR by leaving a link within the comment section. You have until 12 October to be in the running for some RAKs. :)

Here are today's sketches.

Card sketch


Layout sketch

See you tomorrow for Day Five: Hexagons! :)

Wednesday, September 26, 2012

Day Three: Stencils


Amy: Rather than use a traditional stencil, I decided to mask the bloom.  


Super easy smeasy and you can use a sticky note, stamp the image and fussy cut it out.  The beauty of the sticky note is that you can store the mask with the stamps when you're done!


Yvonne: I love to mask and mask and my stencils come out to play a lot! *winks* 


I actually wanted to reverse image of the stencil. So I started by misting on my base white cardstock. I chose two random spots instead of misting on the entire stencil. This helps to create different looks for your background. Then I pressed another piece of white cardstock on the wet stencil for the effect I wanted. [The first cardstock I sprayed on could be used on another project.]


Next I laid the photos in the centre and then added the fussy cut leaves with cute birds to "ground" the photos.


I felt that the patterned paper banner was too "flat" so I added ribbon scraps in a contrasting colour and also added some baker's twine.


Julie: For my project, I took a white wood "A" that my friend Joni gave me (my son's name is Adam) and I painted it blue --- then once that was dry, I took a honeycomb mask and used my friend's Airbrush machine and her Copic markers to airbrush my stencil on!!! Airbrushing with Copic (or any other alcohol based markers) markers is AMAZINGLY fun!! It dries instantly!!! No waiting like you do for misting or paint!! I LOVE IT!!!!!

____________________________________________

Use your imagination to get the most out of your stencils OR look to your existing supplies as templates.  Above all, have fun! If you were inspired to create something based on the stencil trend, please upload your creations to our Flickr pool OR leave a link in the comment section. You have until 12 October to be in the running for some RAKs. :)

Here are today's sketches.

Card sketch

Layout sketch

See you tomorrow for Day Four: Punches and diecuts! :)


Tuesday, September 25, 2012

Day Two: Household Supplies


Yvonne: I love rummaging through my "keep-it-for-a-rainy-day" stash for little fun treasures to incorporate on my creative projects. I love this plastic swing set which I thought would make a lovely focal point for a "New home" card.

It was originally hot pink so I spray painted it silver and adhered it such that you could swing the swing! Super fun! :)


Amy:  Can you spot my households supplies?  I used coffee liners as a ruffle on the tags:)


Julie: My household product is vintage fabric (it was cream when I started)!!!! I took a 12x12 canvas, glued the fabric to it and then painted it and while the paint was still wet, I took Studio Calico mist and misted it!! After everything was dry, I added my quote and the cut the Crate paper to look like stacked books!!

Here is what it looked like when I first glued the fabric on the canvas --


Added paint --


Then mist --


__________________________________________

Are you inspired to see what you can find in your home to incorporate on your projects? We would love to see them! Upload them to our Flickr pool OR feel free to leave a link in the blog comments.

Here are today's sketches.

Card sketch

Layout sketch

See you tomorrow for Day Three: Stencils! :)

Monday, September 24, 2012

Day One: Washi tape


Amy:  I have a very small washi collection.  Can you spot it on my card?  The lower half of the house and the 'flower fields' are made from washi tape.  I love that you can make it look 'uninterrupted'.  The black cardbase really makes everything pop, dontcha think?


Julie: Technically I don't have WASHI tape on my layout now!!! But I did when I started! I used my washi tape as a mask!! Once my background paper was dry, I peeled the tape off and splattered more mists on my page!! Have fun with the washi tapes!!!

Here is what it looked like when I had the Washi Tape on it --


And peeled off once dried -- 


Yvonne: This Lilo and Stitch box was from Hong Kong Disneyland. I love that it's a rocket.


The first thing I did was to spray-paint over the design on the cover, then added washi tape all over.


So I forgot to sand before I did the spray-paint [slaps own forehead], so it was patchy at spots when the paint dried. I decided to add corrugated board to the top exposing just a little of the gold spray paint. A photo of my niece, some trim and a leather rose from an old shoe and my project is saved....err...complete! *winks*


________________________________

Are you having fun yet? Will you be using the washi tape in your stash? We would love to see your take on the washi trend. Please share your inspirations via our Flickr pool. Alternatively, you may leave a link in the comment section. Come play along by October 12 and we'll pick some winners to win a little something from us. :)

Here are today's sketches.

Card sketch

Layout sketch

See you tomorrow for Day Two: Household Supplies! :)